Advanced customization settings
On this page you can find some settings that you won’t find within the Zammad UI. Those settings might come in handy as it can change Zammad’s behavior.
Note
Please note that this is not a full command list, if you’re missing commands, feel free to ask over at the Community.
Send all outgoing E-Mails to a BCC-Mailbox
This option allows you to send all outgoing E-Mails (not notifications) to a specific mailbox. Please note that this shouldn’t be a mailbox you’re importing already! This will apply to all groups and is a global setting.
>> Setting.set('system_bcc', 'alias@domain.tld')
You can easily check the current BCC-Setting by running the following:
>> Setting.get('system_bcc')
Activate counter on grouped overviews
This is a hidden setting which you can only set via Command-Line. This will globally enable a ticket number value in each heading for grouped elements.
>> Setting.set('ui_table_group_by_show_count', true)  # enable counter on grouped overviews
>> Setting.set('ui_table_group_by_show_count', false) # disable counter on grouped overviews
>> Setting.get('ui_table_group_by_show_count')        # get current setting (`nil` is false)

Default ticket type on creation
Zammad allows you to define the default article type upon ticket creation. By default this will be a incoming phone call.
You can choose between
phone-in(incoming call, default),
phone-out(outgoing call) and
email-out(Sending an E-Mail out).
>> Setting.set('ui_ticket_create_default_type', 'email-out')
To check what setting is set currently, simply run:
>> Setting.get('ui_ticket_create_default_type')
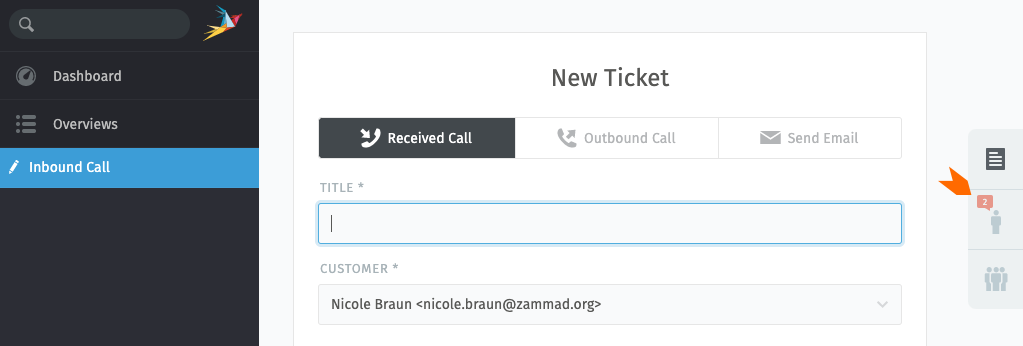
Adding a warning to the ticket creation process
If in case you need to give your agent a note or warning during ticket creation, you can do so with the below command.
You can use three different warnings for
Incoming Calls
:"phone-in"=>"",Outgoing Calls
:"phone-out"=>""andOutgoing E-Mails
:"email-out"=>"".
>> Setting.set('ui_ticket_create_notes', {
      :"phone-in"=>"You're about to note a incoming phone call.",
      :"phone-out"=>"You're about to note an outgoing phone call.",
      :"email-out"=>"You're going to send out an E-Mail."
   })
Note
You can use those three sub-settings independently, if you e.g. don’t need a
warning on incoming calls, simply leave out :"phone-in"=>"" out of the
setting. The setting itself is done within an array ( {} ).
To check what’s currently set, you can use:
>> Setting.get('ui_ticket_create_notes')
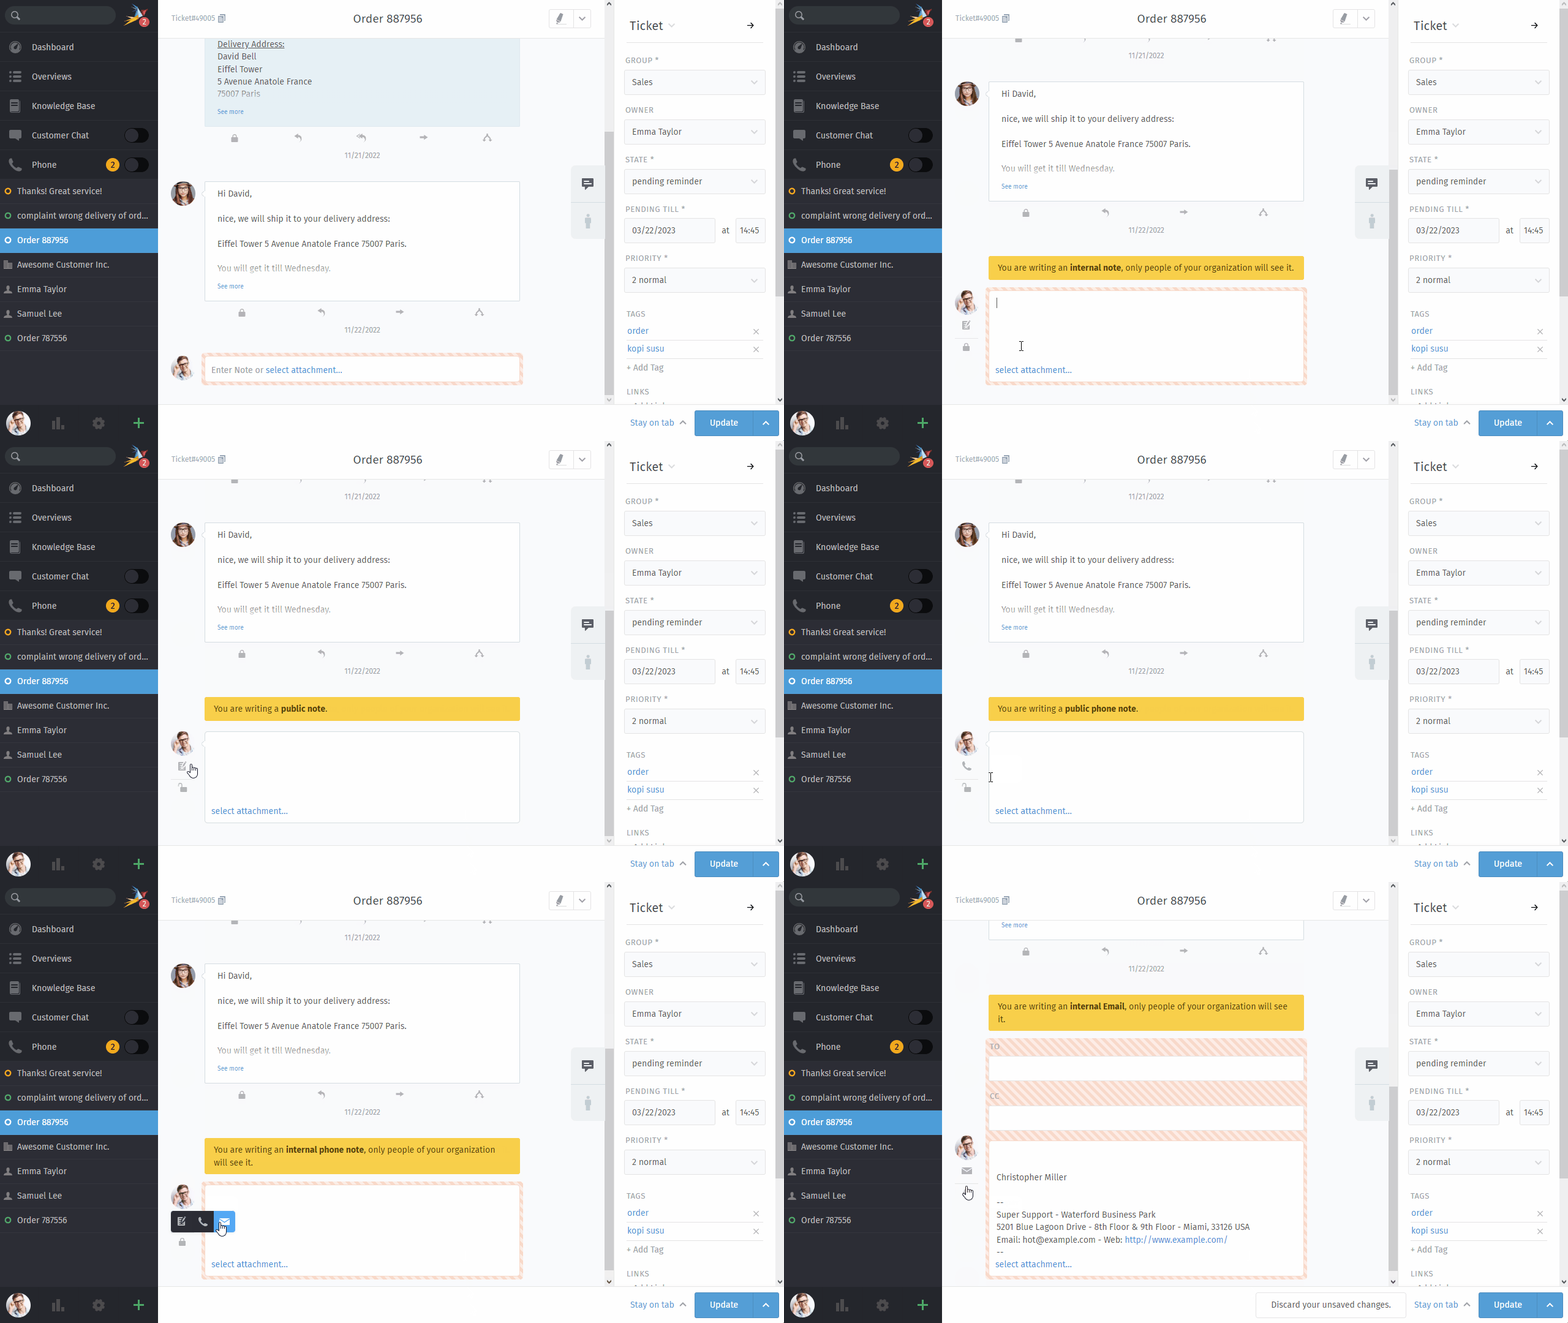
Sample of the above setting:

Adding a warning to the article reply process
In case you need to give your agent a warning during the ticket article reply, you can do that with the command below.
You can provide different warnings for different channels and article visibility
Internal Notes
:"note-internal"=>"",Public Notes
:"note-public"=>"",Internal Calls
:"phone-internal"=>"",Public Calls
:"phone-public"=>"",Internal Emails
:"email-internal"=>""andPublic Emails
:"email-public"=>"".
>> Setting.set('ui_ticket_add_article_hint', {
      :"note-internal"=>"You are writing an |internal note|, only people of your organization will see it.",
      :"note-public"=>"You are writing a |public note|.",
      :"phone-internal" => "You are writing an |internal phone note|, only people of your organization will see it.",
      :"phone-public"=>"You are writing a |public phone note|.",
      :"email-internal" => "You are writing an |internal Email|, only people of your organization will see it.",
      :"email-public"=>"You are writing a |public Email|."
   })
Note
You can use example sub-settings above independently, if you e.g. don’t need
a warning on internal calls, simply leave out :"phone-internal"=>"" out
of the setting. The setting itself is in a form of an array ( {} ).
To check what’s currently set, you can use:
>> Setting.get('ui_ticket_add_article_hint')
Sample of the above setting:

Show Email address of customer on customer selection (ticket creation)
By default Zammad will not display the E-Mail-Addresses of customers. The below option allows you to change this behavior.
>> Setting.set('ui_user_organization_selector_with_email', true)
Get the current state of this setting with:
>> Setting.get('ui_user_organization_selector_with_email')
Change font settings for outgoing HTML mails
Note
Some clients (like Outlook) might fallback to other settings while it might work for other clients.
The below setting allows you to adjust Zammad’s email font setting. This setting does not require a service restart.
>> Setting.set("html_email_css_font", "font-family:'Helvetica Neue', Helvetica, Arial, Geneva, sans-serif; font-size: 12px;")
If you want to check the current setting, you can simply run the below code.
>> Setting.get('html_email_css_font')
Highlight customer’s open ticket count
This option enhances the selected customer’s open tickets count. It highlights the count in different colors if they hit a threshold.
>> Setting.set('ui_sidebar_open_ticket_indicator_colored', true)
Sample of the above setting:

Above settings has specific thresholds as follows. You cannot adjust these thresholds.
Situational threshold list for open ticket indication¶ Situation / View
no indication
warning (orange)
danger (red)
Ticket Zoom
< 2
2
>= 3
New Ticket dialog
0
1
>= 2