Start
We will be very happy if you decide to contribute to Zammad. You can do this in several ways. Contributions are mainly done by forking one of our repos on GitHub and creating a pull request with your changes (except for translations, see below). 🚀
You can contribute to:
Please have a look on our notes on how to contribute below.
All repos can be found at https://github.com/zammad
Zammad Source Code
The Zammad source code can be found on GitHub at https://github.com/zammad/zammad
For more information on how to contribute to Zammad, please have a look at https://zammad.org/participate and at the Developer Manual.
Supported Branches / Versions
The main Zammad repository at https://github.com/zammad/zammad has several branches.
develop
This is the current (unreleased) development state of next major release (this will become the new
stablebranch).Don’t use it for production!
Supported with bug and security fixes - see also our Security Policy.
stable
This is the current stable release, e.g. Zammad 5.2.
Use this branch for production installations.
Supported with bug and security fixes - see also our Security Policy.
stable-x.y
These are the branches of old versions of Zammad like
stable-5.1for Zammad 5.1.No support for bug or security issues is provided.
Documentation
Do you want to contribute to the Zammad documentation?
Open a new GitHub pull request at
https://github.com/zammad/zammad-documentation (this documentation)
with your changes.
The Zammad documentation is hosted on Read the Docs. You can read it there at
https://docs.zammad.org (this documentation)
or browse the files via GitHub which also renders the used ReStructuredText markup.
ReStructuredText Markup
If you like to edit the docs, use the ReStructuredText markup language. Information about this language can be found at:
Thanks! ❤ ❤ ❤
Zammad Team
Translation
If you want to help us with translation and improve the multi-language support of Zammad and/or the documentation, you are welcome to contribute as well! The translation of Zammad itself and the documentation is done by using Weblate, which is a service for the collaborative translation of projects.
You just have to head over to Zammad’s Weblate instance. You can either create an account (if you don’t have one already) or even sign in with your Github account!
We will cover some basic steps in the following sections to get you started with translating. However, if you want to use some additional features of Weblate and want to dive deeper into it, their translation documentation is a good starting point.
Basics
The translation of Zammad and the translation of the documentation are split into two projects in Weblate. When you click in the top menu under “Projects > Browse all projects”, you can find the overview of the two projects:
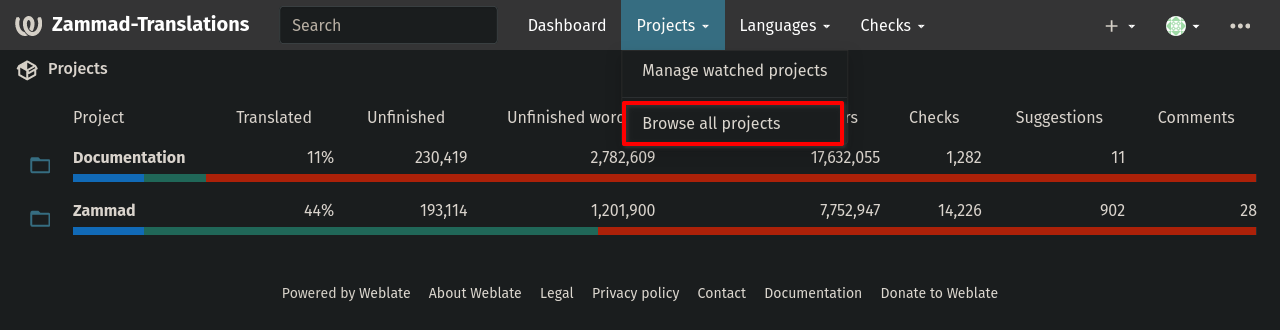
Screenshot showing translation projects and menu bar of Weblate
Structure of translation projects in Weblate:
Documentation
User Documentation (latest)
User Documentation (pre-release)
Admin Documentation (latest)
Admin Documentation (pre-release)
Zammad
Zammad (development version)
Zammad (stable version)
Some more which aren’t relevant here
Note
It is no big difference if you choose latest or pre-release (for the
documentation) or development version or stable version (for
Zammad). When Weblate detects the same strings in different versions,
they will be used for all versions and only have to be translated once.
After selecting a project (Documentation or Zammad), you will see different sub-projects and their translation status summarized for all languages. These overviews may show a quite low translation rate, which is due to the amount of acive languages.
Here you can select one of the “components”, which is more or less the same as different versions. After selecting one of them, you can see the status of translation for the different languages, as you can see in the following screenshot with an example from Documentation > User Documentation (latest):
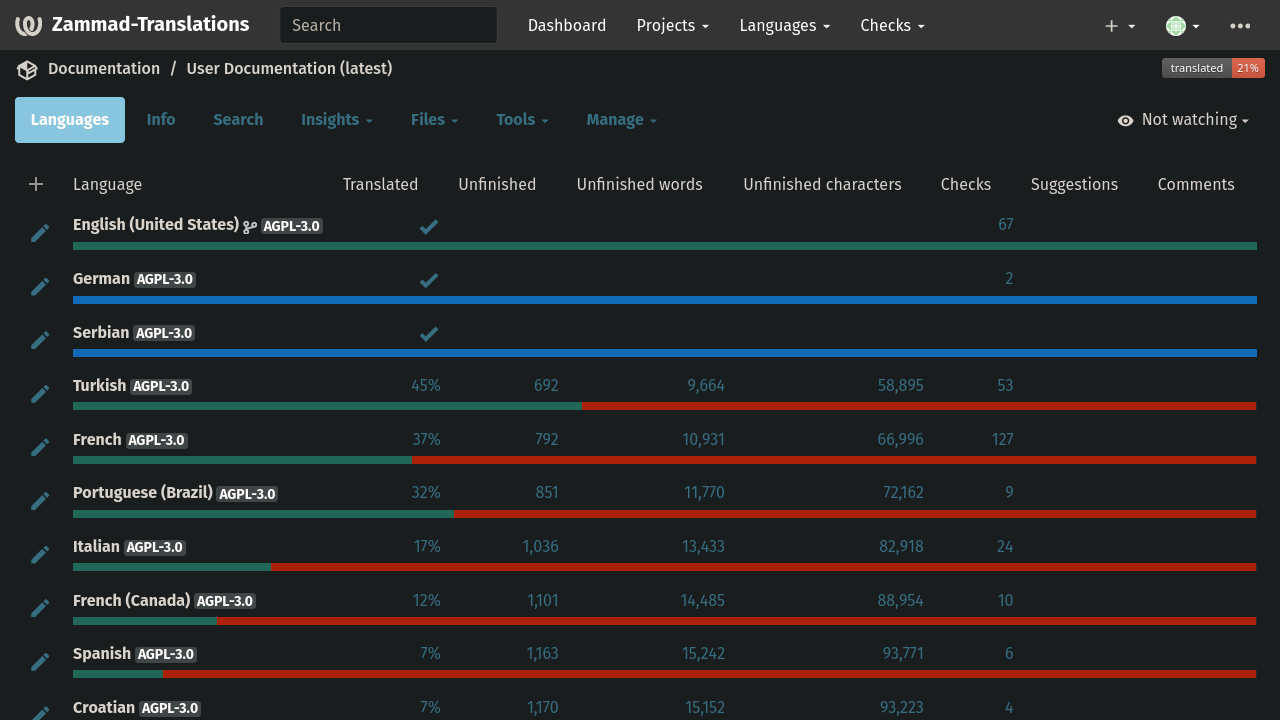
Screenshot showing translation status of different languages for the user documentation
Translating
After selecting your languange you want to translate to, a good starting point is to select “Untranslated strings” (or the same meaning in your language, depending on what you have set in your profile).
After that, you will finally see the first untranslated string in the upper field and, in theory, you can start to translate. First a brief overview of the user interface of Weblate:
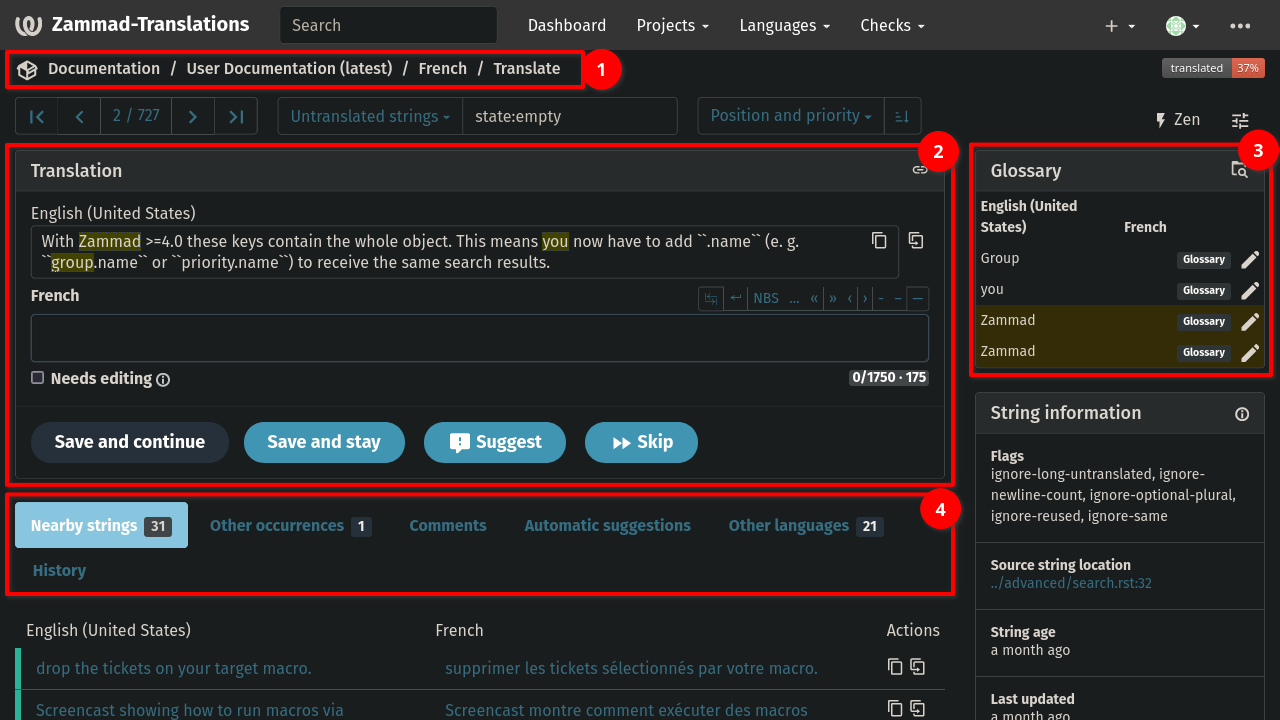
Breadcrumbs with path to the current project and language
Translation area itself. You can find the source string (“English (United States)”) at the top and the field for your translation (“French” in this example).
Glossary: here you can find common translations in Zammad context. The terms from the glossary are highlighted in the source strings, as well.
Some useful tabs:
Nearby strings: shows you the context of the word or string
Automatic suggestions: here you can find automatic suggestions from DeepL and suggestions from similar strings, which are already translated. Use the “Clone to translation” button to insert it in the translation field to apply changes. Use the “Accept” button to accept the suggested translation and automatically switch to the next string.
Other languages: here you can get an overview, which languages are translated and you can also see the translated strings (could be useful for languages, which are similar).
Troubleshooting
And finally some notes for “special” source strings, you might see in the documentation projects (see RestructuredText for details):
- ``example-string``
This is rendered as
example-string. Depending on the context, it can be translated or not. In any case, use the `` before and after the string in your translation.- :doc:`example <path/to/document>`
This is a link to another page. Some links doesn’t have the “example” part included, e.g. :doc:`path/to/document. The above “example” is the text, which is shown as link. This part can be translated. The path/to/document may not be translated, otherwise the link would not work anymore.
- `some text <https://example.com>`_
This is a link which can refer to an external website. “some text” is the displayed text in the documentation, the part between < and > is the link target. The _ at the end is important and must remain in the translated text.
- :admin-docs:`some text </manage-text-modules.html>`
This is a link which refers to external documentation. “some text” is the displayed text in the documentation, the part between < and > is the link target. Note the absence of _ at the end, since this link is using a different construction mechanism.
- **example string**
Markup for text (e.g. bold, italics). Alternative: *example string*. These strings can be translated, but the markup labeling (e.g. one or more *) should be adopted true to meaning.