First steps
After successfully installing Zammad you’ll have a couple of options.
Start from scratch (move on to the next section)
Getting Started Wizard
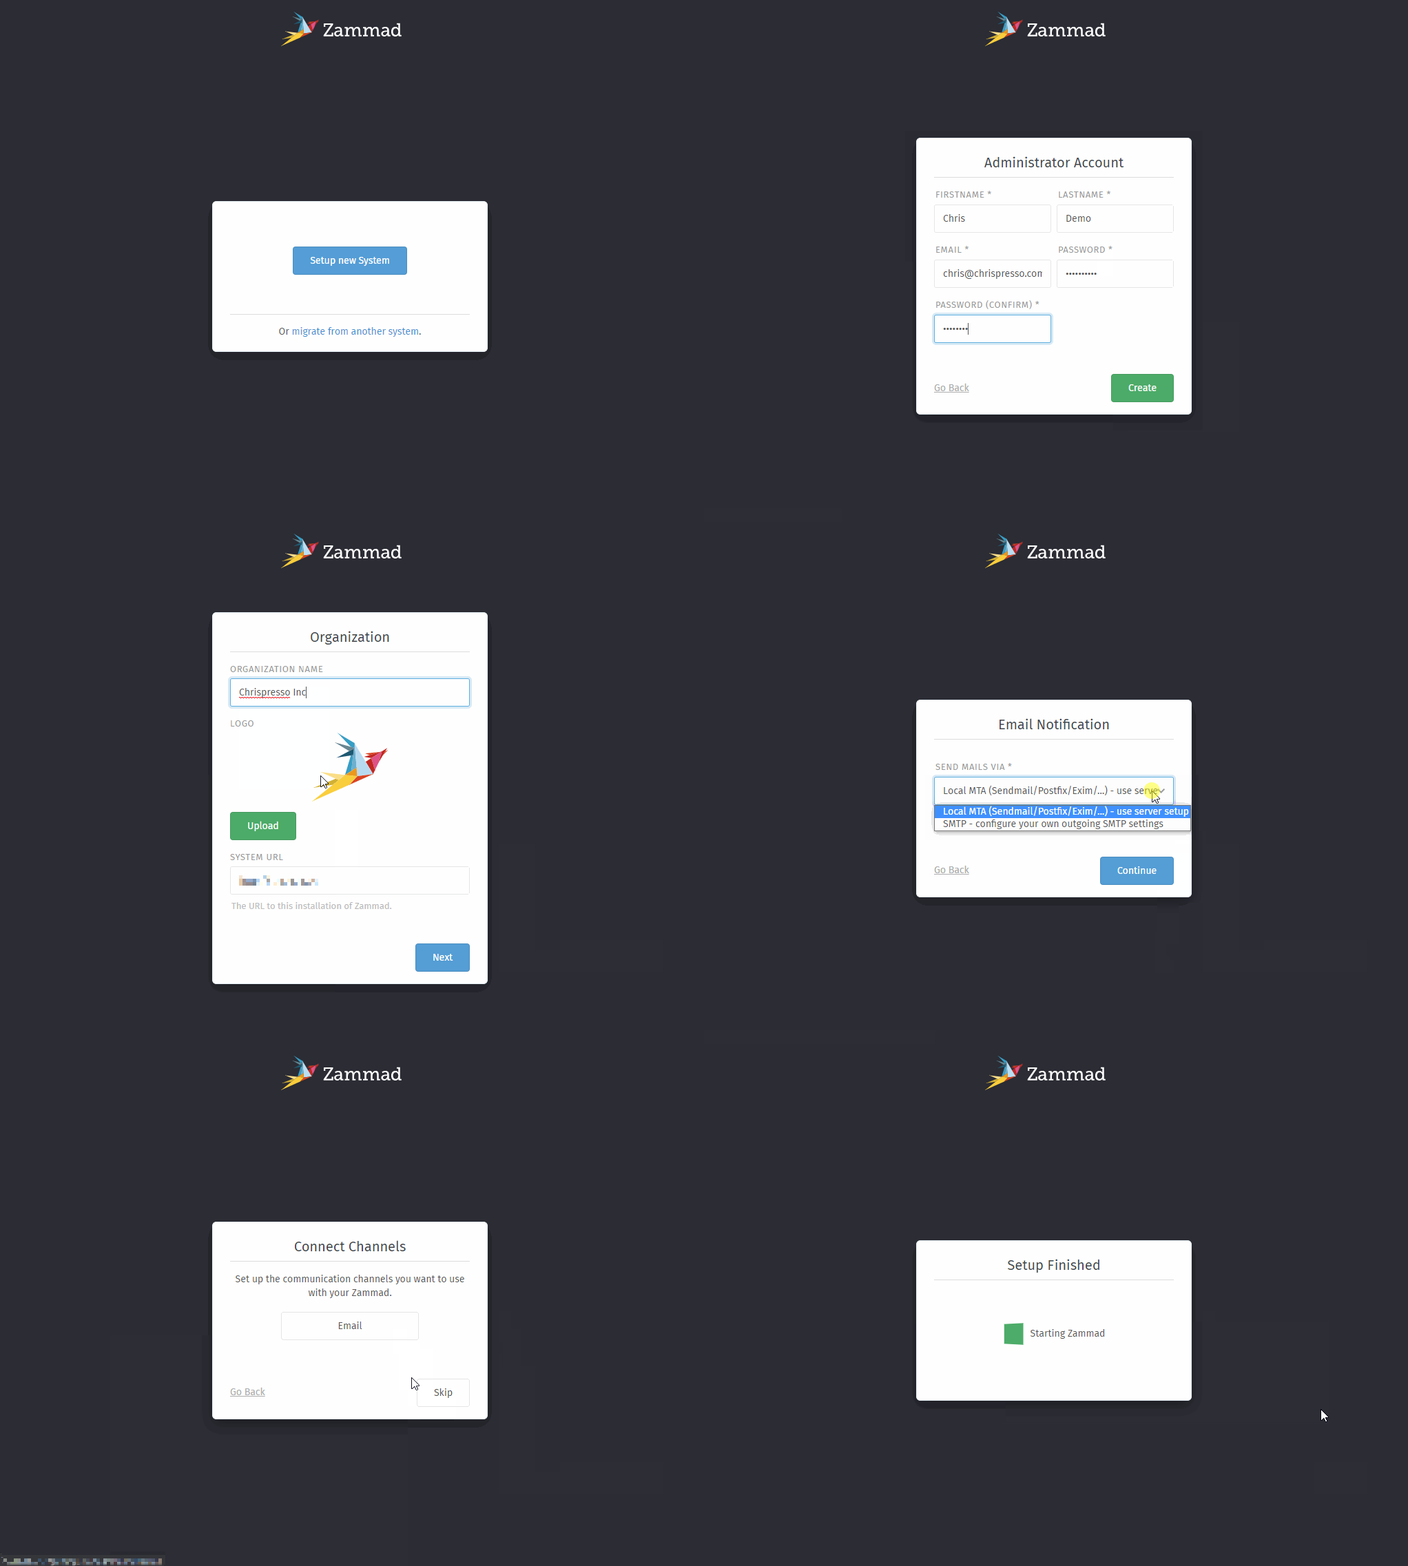
If you visit Zammad’s web page the first time, you’ll be greeted by its Getting Started Wizard. It will guide you through the first most important things.
- Step 1: Create your very first administrator account
The fields should be fairly self explaining.
Zammad does require the following password security by default:
Password length of 10 or more
2 upper and 2 lower characters
contains at least one digit
- Step 2: Provide company information
You can upload a custom logo fitting to your company here. The instance address is detected automatically and only required adjustment in case it’s detected wrong.
All of these settings can be changed within Branding and System settings.
- Step 3: E-Mail notification channel
By default Zammad uses sendmail - if that doesn’t fit you can change it to SMTP here.
Zammad uses
noreply@<your-fqdn>as sender address by default. SMTP setups might fail - you may want to skip this step with choosingsendmailat this point. You can adjust it later!- Step 4: Your first email channel (optional)
If you want to start right away, you can connect your email account already.
Warning
Zammad reacts to fetched emails by default. If that’s not what you want, skip this step for now.
Learn more about the email channel within the documentation for email channels.
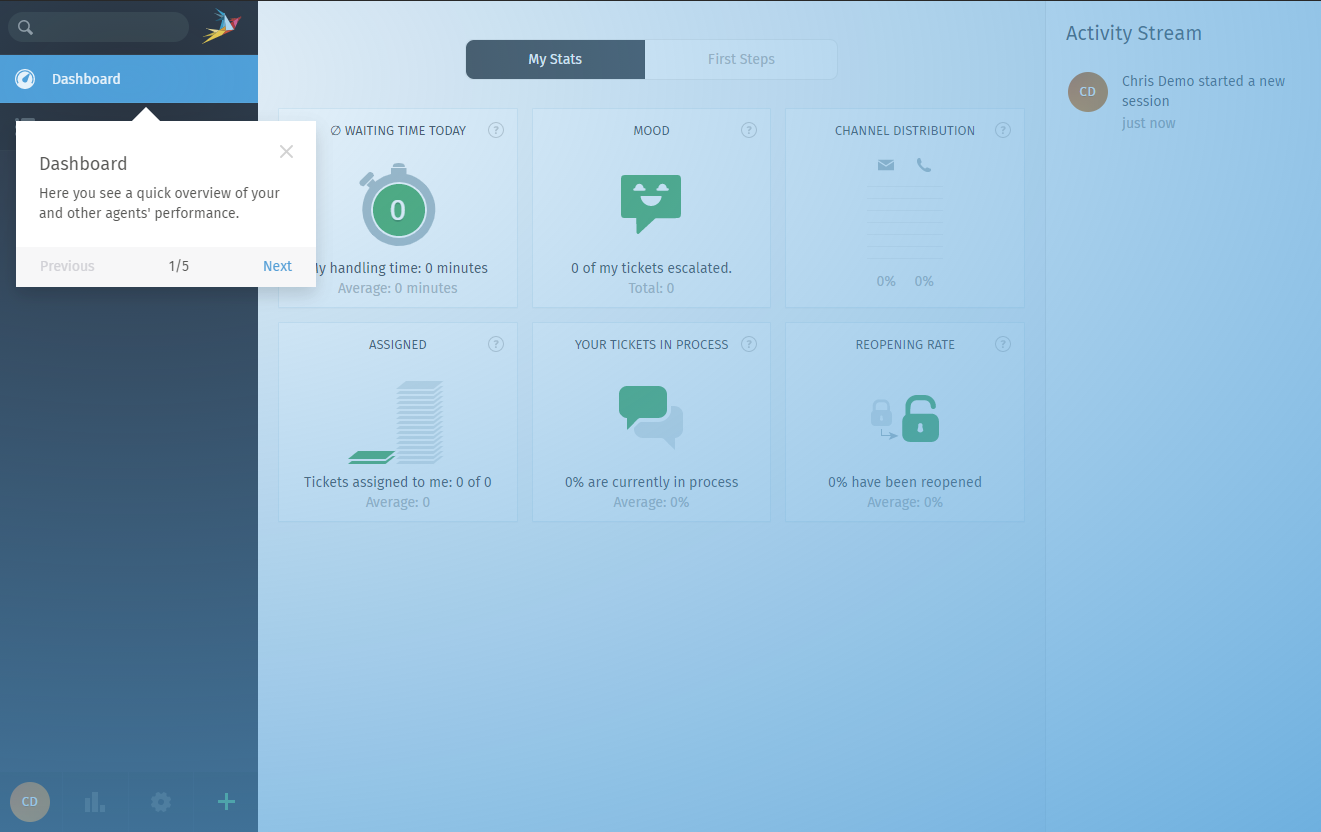
After finishing the wizard you’ll be automatically logged in to the just created account.
Further Steps
In our opinion the next step order would like below sample. You can skip parts you don’t need or adapt. All parts are described within Zammad’s admin documentation.
Configure your required groups
Adjust triggers as needed
Add postmaster filters if needed
Configure SLAs if needed
Add Text Modules
Add Organizations
Configure roles if needed
Consider Third Party logins or LDAP integration for easier logins
Add agent accounts (users)
Consider backup strategies for Zammad, see Backup and Restore
From point 5 on you’ll be able to work productive in theory. 🙌
Hint
😖 Are you still lost?
If above list doesn’t help you or you’ll need to jump in a lot faster, you can also get Workshops with one of our Zammad consultants.

